Overview of Chainguard's Package Repositories
Overview of Chainguard's package repositories, highlighting the different repositories and how to access them.
8 min read
For the complete documentation index, see llms.txt.
The Chainguard platform supports Single Sign-on (SSO) authentication for users. By default, users can log in with GitHub, GitLab, and Google, but SSO support allows users to bring their own identity provider for authentication. This is helpful when your organization mandates using a corporate identity provider — like Okta or Azure Active Directory — to authenticate to SaaS products.
Once an administrator has configured an identity provider and set up their organization, users can authenticate at the command line and in the web console using the identity provider’s organization.
chainctl
chainctl, the Chainguard command line interface (CLI), supports SSO authentication by supplying the identity provider organization name as a flag or by setting it as a default in configuration. To use a flag to authenticate using SSO, pass the --identity-provider flag to chainctl auth login.
export IDP_ID=<your identity provider id here>
chainctl auth login --identity-provider=$IDP_ID
You can retrieve all your identity provider’s unique IDs by running chainctl iam identity-providers list.
Note that you can also use the --headless option to log in with a custom IDP in an environment that doesn’t have a browser installed, such as a container or a remote server. By including this option, chainctl will output a special URL. You can then navigate to the URL in another device’s browser to log in with your custom IDP.
To log in with a custom IDP using the --headless option, you would run a command like the following:
chainctl auth login --headless --identity-provider=$IDP_IDThen you can use the URL in this command’s output to complete the login flow from another device’s browser.
Note: As of this writing (September 2024), using the headless login flow with a custom IDP is still an experimental feature. Please reach out to us through your customer success manager or the support portal to report any feedback. Also, until this feature becomes enabled by default, you must enable it yourself with the following command:
chainctl config set auth.device-flow chainguardAs an alternative to remembering identity provider IDs, you can set the default identity provider by editing the chainctl configuration file. You can do so with the following command.
chainctl config editThis will open your system’s default text editor where you can edit the local chainctl config. Add the following lines to this file.
default:
  identity-provider: <your identity provider id here>
Then save and close the file. If your system’s default editor is nano, for example, you can do so by pressing CTRL + X, Y, and then ENTER.
You can also set this with a single command using the chainctl config set subcommand, as in this example.
chainctl config set default.identity-provider <your identity provider id here>Once set, the configured identity provider will be used automatically any time you run chainctl auth login.
chainctl using a Verified Organization
If your organization is verified, you can use your organization name instead of the ID of your identity provider to authenticate.
chainctl auth login --org-name example.comYou can add your organization’s name to your chainctl config to make this a default setting.
defaults:
  org-name: example.com
To learn more about working with your chainctl config, you can read our doc on How to Manage chainctl Configuration.
To authenticate with the Chainguard Console, open the login screen. Then, select one of the following options:
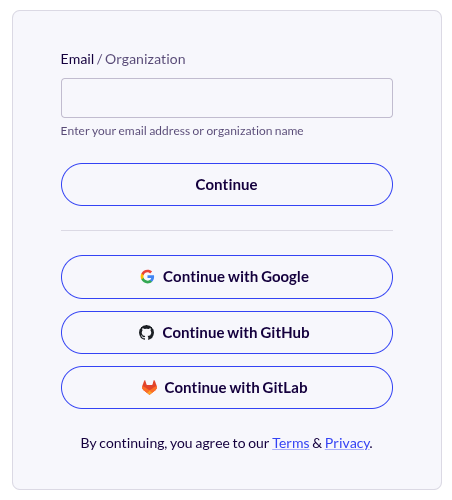
In each of these cases, you will be redirected to an external identity provider to authenticate and then returned to the Chainguard Console. If you are using your email and a password, authentication is handled by and credentials are stored with Auth0.
Chainguard SSO supports OpenID Connect (OIDC) compatible identity providers. In addition, identity providers must support the following:
authorization code grant type (sometimes called the authorization code flow).openid, email, and profile scopes. Note that the Chainguard platform will partially function with only the openid scope, but full functionality requires the email and profile scopes as well.Customer-managed identity providers must also have a public, unauthenticated OIDC discovery endpoint.
Typically, identity providers enable you to set up SSO by creating a specific resource on the provider’s platform. For example, Ping Identity requires you to add an application, while Okta has you create an app integration.
To set up SSO for your identity provider, you must configure one of these resources to use OIDC so that the Chainguard platform can interact with the provider. Following that, you have to configure the Chainguard platform to use that application.
We have published guides for multiple platforms, including Okta and Ping Identity. If you aren’t using one of these identity providers, you can complete the following Generic Integration Guide to configure your provider to work with Chainguard. However, be aware that Chainguard does not actively support identity providers other than the ones listed previously. If you are using an alternate identity provider, we encourage you to contact us to learn more.
For a generic OIDC-compatible identity provider, start by creating an OIDC application. If possible, set as much metadata as possible for the application so that your users can identify this application as the Chainguard platform. The following assets and details can be helpful to include in the metadata:
Next, configure your OIDC application as follows:
https://issuer.enforce.dev/oauth/callbackFinally, configure a set of client credentials and make note of the following details to configure Chainguard:
Next, use chainctl to log in to Chainguard with an OIDC provider (such as Google, GitHub, or GitLab) to bootstrap your account.
chainctl auth loginThe bootstrap account can use any supported IDP – for example you may choose to temporarily use a personal Google account. You can leave this account active as a backup account or, if you prefer, you can delete the account by removing the role-binding after configuring the custom IDP.
Create a new identity provider using the details you noted from your OIDC application. Be sure to update the details in the following example export commands to align with your own application/client ID, client secret, and issuer URL.
export NAME=my-sso-identity-provider
export CLIENT_ID=<your application/client id here>
export CLIENT_SECRET=<your client secret here>
export ISSUER=<your issuer url here>
export ORG=<your organization UIDP here>
chainctl iam identity-provider create \
  --configuration-type=OIDC \
  --oidc-client-id=${CLIENT_ID} \
  --oidc-client-secret=${CLIENT_SECRET} \
  --oidc-issuer=${ISSUER} \
  --oidc-additional-scopes=email \
  --oidc-additional-scopes=profile \
  --parent=${ORG} \
  --default-role=viewer \
  --name=${NAME}
The oidc-issuer, oidc-client-id, and oidc-issuer-secret values are required when setting up an OIDC configuration with chainctl. You must also include a unique name for each custom IDP account.
Be aware that if you don’t include the --parent or --default-role options in the command, you will be prompted to select these values interactively
--parent option specifies which Chainguard IAM organization your identity provider will be installed under.--default-role option defines the default role granted to users registering with this identity provider. The previous example specifies the viewer role, but depending on your needs you might choose editor or owner. For more information, refer to the IAM and Security section.You can retrieve a list of all your Chainguard organizations — along with their UIDPs — with the following command.
chainctl iam organizations ls -o table ID | NAME | DESCRIPTION
--------------------------------------------------------+------------+---------------------
59156e77fb23e1e5ebcb1bd9c5edae471dd85c43 | sample_org |
. . . | . . . |Your organization selection won’t affect how your users authenticate but will have implications on who has permission to modify the SSO configuration.
Identity providers can be managed via chainctl using the chainctl iam identity-provider subcommand.
To create new providers, you can use the create subcommand.
chainct iam identity-provider createTo list out every configured identity provider, run the list subcommand.
chainctl iam identity-provider listThis will return a list of details for each of your identity providers, including their names and unique IDs.
To modify an existing identity provider, use the update subcommand.
chainctl iam identity-provider updateThis can be useful for rotating client credentials.
Lastly, to delete an identity provider, run the delete subcommand.
chainctl iam identity-provider deleteFor more details, check out the chainctl documentation for these commands.
Once an identity provider has been created on the Chainguard platform, any user that can authenticate with that identity provider will be able to use it to access the Chainguard platform. It’s important to note that users can do so even if they have no IAM capabilities with the IAM organization at which the identity provider is defined. Identity providers give access to the Chainguard platform, but not the specific IAM organization where the identity provider is defined.
The IAM capabilities identity_providers.create, identity_providers.update, identity_providers.list and identity_providers.delete control which users can read and manipulate identity providers. The built-in roles viewer, editor and owner have the following capabilities related to identity providers.
| Role | Capabilities |
|---|---|
viewer | identity_providers.list |
editor | identity_providers.list |
owner | identity_providers.create, identity_providers.list, identity_providers.update, identity_providers.delete |
In the case of an outage or misconfiguration of your identity provider, it can be helpful to have an authentication mechanism to the Chainguard platform outside of your SSO identity provider for recovery purposes. To this end, you can use one of our OIDC login providers (currently Google, GitHub, or GitLab) to create a backup account.
As an OIDC login account needs to be set up to bootstrap the SSO identity provider initially, it’s possible to keep this account as a backup account in case you need it for recovery. However, the nature of these OIDC provider accounts is such that it is difficult to share them as a backup resource since they’re often tied to a single user.
Instead of relying on an account with an OIDC login provider, you can alternatively set up an assumable identity to use as a backup account. Refer to our conceptual guide on assumable identities to learn more.
Last updated: 2025-01-07 15:22